Adeptas Sororitas Regenesis Project
+6
Planes
ScottRadom
Roland
Deadlytoaster
Selik
dusktiger
10 posters
Page 2 of 4
Page 2 of 4 •  1, 2, 3, 4
 Re: Adeptas Sororitas Regenesis Project
Sharp! Good work Mike.

Lore Weaver- Lord of Titan
- Posts : 4609
Join date : 2010-01-05
 Re: Adeptas Sororitas Regenesis Project
Way better than what I'm capable of.
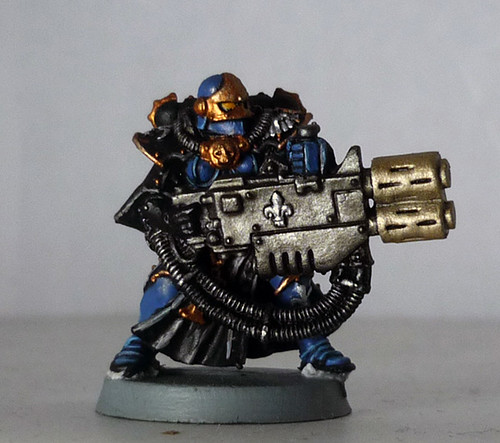
A wash on the barrel to show the recesses would work.
Assuming all the details are yet to be painted.
Is it just the initial highlight on the cloak? Looks kinda weird as is.
A wash on the barrel to show the recesses would work.
Assuming all the details are yet to be painted.
Is it just the initial highlight on the cloak? Looks kinda weird as is.

Roland- Lord of Titan
- Posts : 3544
Join date : 2011-01-26
Location : Saskatoon
 Re: Adeptas Sororitas Regenesis Project
they were supposed to be the final highlight, but i kinda fucked up on the cloak cause i was really tired and just wanted to finish it before bed. a nuln oil wash will fix it up though.
this being the test mini for the heavy weapon squad, i think for the next 3 i'll paint the barrel black, then do what i did here; coat the outer metal in leadbelcher followed by a drybrush with golden griffon. the body of the multimelta is leadbelcher with 2 coats of nuln oil.
the rest of this squad's in a strip bath today.
 Re: Adeptas Sororitas Regenesis Project

finished the strip bath, started putting the initial blue basecoat on the armor. going to try to do this squad in an assembly line style.
 Re: Adeptas Sororitas Regenesis Project
these 4 have been done a little different. instead of a line highlight, these just have a drybrush highlight.
blue went like this:
basecoat Kantor Blue.
Wash Drakenhof Nightshade
Layer Altdorf Guard Blue
Drybrush Skink Blue
this was finished with a light coat of Guilliman Blue Glaze to blend the blues together and mute any harsh blue highlights from the Skink Blue.
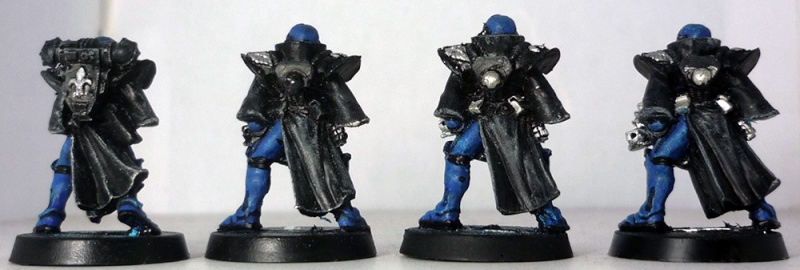
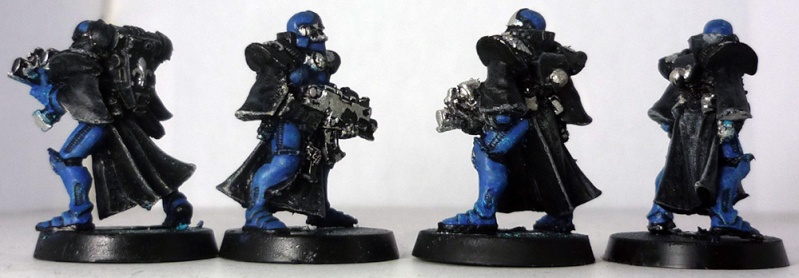
the robes are thus:
Basecoat Army Painter Matte Black
Overbrush Longbeard Grey
Drybrush Terminatus Stone - this was done only on hard edges that stuck out.


 Re: Adeptas Sororitas Regenesis Project
this is after a wash of nuln oil on the fabric to make it more matte.
the gold is the basecoat, using Balthasar Gold. it'll be coated with gehenna's gold, then drybrushed with golden griffon
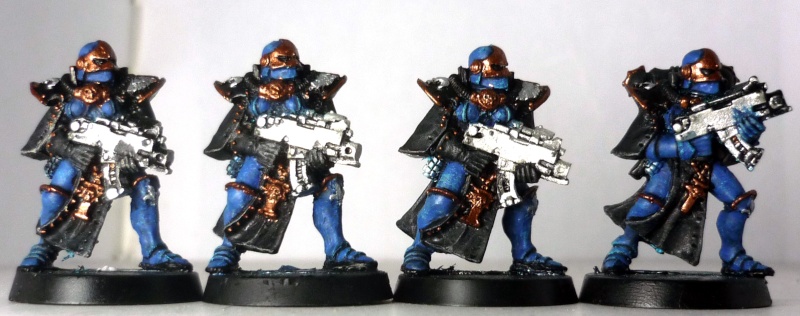
the gold is the basecoat, using Balthasar Gold. it'll be coated with gehenna's gold, then drybrushed with golden griffon

 Re: Adeptas Sororitas Regenesis Project
all they need is the bases and eye lenses done. not sure on the lens color though. it has to stand out against the gold, and red sort of blends too easily at that size. the yellow on the test was ok, just not sold on it yet. tried white too, but it looked off.
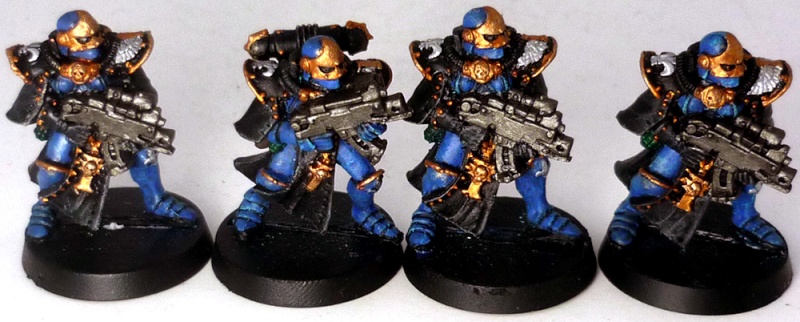

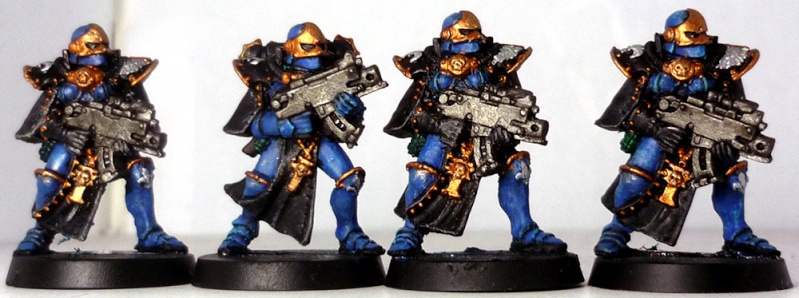


 Re: Adeptas Sororitas Regenesis Project
one of the finished girls with the new base design. managed to find my camera's manual and learned how to tweak the exposure so these shots look a lot better. i'd say these are extremely close to the actual look of the model in person.


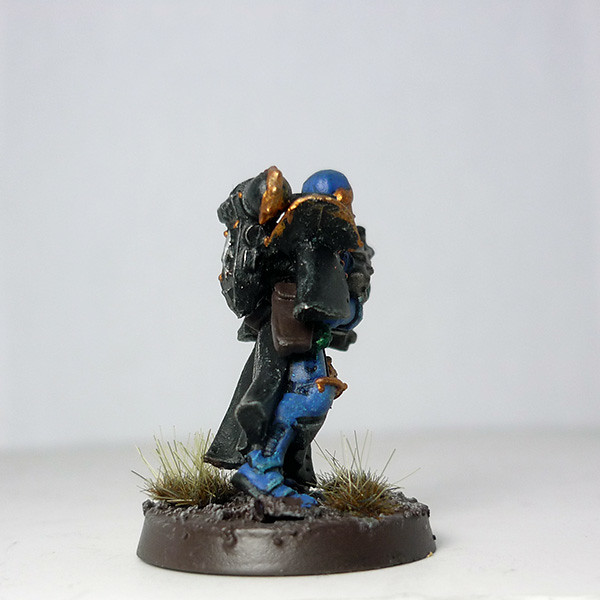


 Re: Adeptas Sororitas Regenesis Project
here's the lone Heavy Bolter girl in the retributor squad.


and this is what i take the photos in. it's made from foam board, and has an inner cube dimension of 9" so it'll allow for anything short of most super-heavy tanks. the glue separated slightly while cooling down so there's tiny gaps in the corners, but im thinking i may get some kind of drywall or something to fill those lines in and make it seamless. for now though, it does a nice job lighting up the models.


and this is what i take the photos in. it's made from foam board, and has an inner cube dimension of 9" so it'll allow for anything short of most super-heavy tanks. the glue separated slightly while cooling down so there's tiny gaps in the corners, but im thinking i may get some kind of drywall or something to fill those lines in and make it seamless. for now though, it does a nice job lighting up the models.


 Re: Adeptas Sororitas Regenesis Project
A light tent or photo box is supposed to have translucent walls. The goal being to shine the light through the walls and the material helps diffuse and scatter the light from all directions without producing any glare. I think yours is more or less just a box from the picture. Do you shine the light from the front of the box next to the camera for pictures? A better set up is something like this...
https://www.youtube.com/watch?v=WoyszgrcINg&feature=related
Also if you change the colour on the helmets from yellow to red I suspect you'll be happier with the outcome. Yellow and gold do not contrast with each other. Just some thoughts.
https://www.youtube.com/watch?v=WoyszgrcINg&feature=related
Also if you change the colour on the helmets from yellow to red I suspect you'll be happier with the outcome. Yellow and gold do not contrast with each other. Just some thoughts.

ScottRadom- Lord of Titan
- Posts : 1167
Join date : 2008-03-20
Age : 48
Location : Saskatoon Represent!
 Re: Adeptas Sororitas Regenesis Project
*sigh* yes scott, i know there's better setups. but this cost me $3 to make and it's better than having my monitor backdropping the photos. the first one i used had transparent walls and i'd shine lamps through the sides and top to diffuse. this one just shines through the front because i use photoshop to alter the photo to get it back to what it looks like in person after the fact.
 Re: Adeptas Sororitas Regenesis Project
You're a dude who knows how to do things with tools and stuff.
Just rip the sides off and put a white nylon or paper or something there. Or build something??? I dunno. I'm not "handy".
Just rip the sides off and put a white nylon or paper or something there. Or build something??? I dunno. I'm not "handy".

Lore Weaver- Lord of Titan
- Posts : 4609
Join date : 2010-01-05
 Re: Adeptas Sororitas Regenesis Project
That's foam board right?
Hobby knife, printer paper + masking tape = translucent panels
Spackle in the corners/edges will solve the light bleed.
Hobby knife, printer paper + masking tape = translucent panels
Spackle in the corners/edges will solve the light bleed.

Roland- Lord of Titan
- Posts : 3544
Join date : 2011-01-26
Location : Saskatoon
 Re: Adeptas Sororitas Regenesis Project
i actually had that setup with the last one; used paper for the walls. problem with the paper was it eventually yellows over time so i had to replace it. so far, this box (number 4) is cleaner and whiter, and i get better results from it now when i want to delete backgrounds and put colored horizons behind the model.
box number 3 had a foam board floor and that never yellowed, so i decided to try a solid box this time.
"eventually" though, if i decide to do photography more seriously, i have a set of instructions to make one of those expensive ones using parts you can buy from Lowes. to sum it up, its a big tube frame that you drape a fabric backdrop on and it'll let you take photos of anything. but since i usually photoshop out my backgrounds when i do photos, its just not worth the money or the space a 2'x3' station would take up in a tiny apt.
plus there's also the fact that my rat, Kuro, would tear apart the paper walls from time to time.
 Re: Adeptas Sororitas Regenesis Project
dusktiger wrote:*sigh* yes scott, i know there's better setups. but this cost me $3 to make and it's better than having my monitor backdropping the photos. the first one i used had transparent walls and i'd shine lamps through the sides and top to diffuse. this one just shines through the front because i use photoshop to alter the photo to get it back to what it looks like in person after the fact.
I guess so long as you're having fun!

ScottRadom- Lord of Titan
- Posts : 1167
Join date : 2008-03-20
Age : 48
Location : Saskatoon Represent!
 Re: Adeptas Sororitas Regenesis Project
ScottRadom wrote:I guess so long as you're having fun!
Scott, come on over, we'll listen to Wired and have a gay 'ol time. I'll wear my reindeer sweater. *laughs*

Lore Weaver- Lord of Titan
- Posts : 4609
Join date : 2010-01-05
 Re: Adeptas Sororitas Regenesis Project
Need to magnetize the paper.

Planes- Lord of Titan
- Posts : 3156
Join date : 2011-11-27
Location : Mai'laun

Roland- Lord of Titan
- Posts : 3544
Join date : 2011-01-26
Location : Saskatoon
 Re: Adeptas Sororitas Regenesis Project
I bought this.
http://www.dinodirect.com/light-tent-50cm-round-photo-studio.html?cur=CAD&vn=RGlub2RpcmVjdEZ1Y2s&AFFID=67
I found mine on eBay for 10$ plus 5$ for shipping. It collapses, has enough space inside for a Rhino, maybe a land raider. If you want plain backgrounds I'd reccomend using heavy paper behind your mini rather than shopping them in as they tend to look a little off (so I'm told by pro's anyway). You could print your own but I just buy paper for scrapbooking. Tough, thick, and cheap at around 50 cents a sheet.

ScottRadom- Lord of Titan
- Posts : 1167
Join date : 2008-03-20
Age : 48
Location : Saskatoon Represent!
 Re: Adeptas Sororitas Regenesis Project
I never know what to say on your posts Mike. If someone offers advice.. You take it personal, get huffy, or think they're out to get you.
I dont know what we're supposed to say on most of your posts.
If your going to post anythng at all on the forums.. It should be on the basis of .. Hey, whatcha guys think.. No t.. Hey, look what i did, enjoy it.. Dont comment on it.
Its very confusing.
I dont know what we're supposed to say on most of your posts.
If your going to post anythng at all on the forums.. It should be on the basis of .. Hey, whatcha guys think.. No t.. Hey, look what i did, enjoy it.. Dont comment on it.
Its very confusing.
System Commander- System Commander
- Posts : 4695
Join date : 2008-02-26
 Re: Adeptas Sororitas Regenesis Project
Prep work on the command rhino:
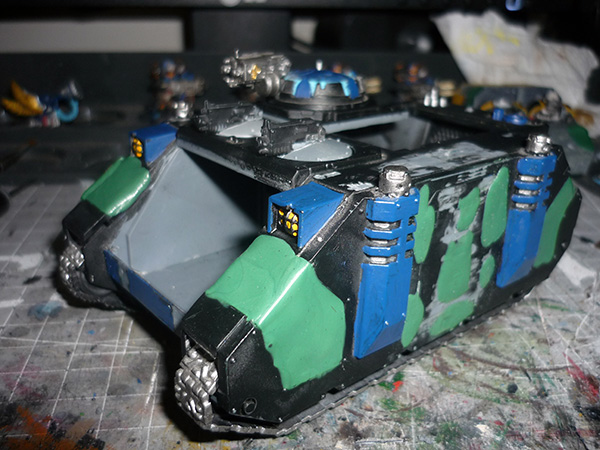

green stuff set, sanded, and basecoat applied to make the next stage easier to work on:


green stuff set, sanded, and basecoat applied to make the next stage easier to work on:


 Re: Adeptas Sororitas Regenesis Project
oh wow.
What're you using to smooth out the putty?
What're you using to smooth out the putty?

Lore Weaver- Lord of Titan
- Posts : 4609
Join date : 2010-01-05
 Re: Adeptas Sororitas Regenesis Project
spit and my thumb lol. im amazed it gets a good result, but after minor sanding, it looks fairly smooth.
when i have some cash to spend, i want to buy some of these clay shapers another guy on B&C recommended to me for doing sculpting work. he says he uses the white ones the most. dude does alot of true-scale sculpting and always gets smooth nice looks to his upsized armor with these things. cant say i'd seen them at Michael's yet, so i might have to order some online.

when i have some cash to spend, i want to buy some of these clay shapers another guy on B&C recommended to me for doing sculpting work. he says he uses the white ones the most. dude does alot of true-scale sculpting and always gets smooth nice looks to his upsized armor with these things. cant say i'd seen them at Michael's yet, so i might have to order some online.

Page 2 of 4 •  1, 2, 3, 4
 Similar topics
» Ben's Biggest project ever!
» little truck mod project
» The Daemon Project...
» Knight project
» A terrain project
» little truck mod project
» The Daemon Project...
» Knight project
» A terrain project
Page 2 of 4
Permissions in this forum:
You cannot reply to topics in this forum
 Home
Home Gallery
 Register
 Log in


